
Since my last post the string wall development has been moving towards the final piece that will be installed, I set up the CAD drawings to be put on the CNC. I was really happy with the way they turned out and it gave me a real boost. Normally I’m convinced that Auto CAD is not my forte but all the drawings I have done for this project I have knocked out in no time and with no problems!

Auto CAD Drawing for String Wall
They were cut out on the CNC and after some light sanding they looked great! The lines and holes re so much cleaner both on the uprights and the bases. The colour is to change for the final piece, most likely painted white but so far I am very happy with them.

Silk Mill String Wall Final Prototype
I started to thread up the pieces today with the new white threads; I was really happy with the way that they looked but as I worked it became apparent that the materiality of the thread wasn’t appropriate. As I pulled it taut it started to give and stretch meaning that it didn’t hold the tension that the piece requires.

- Silk Mill String Wall Final Prototype
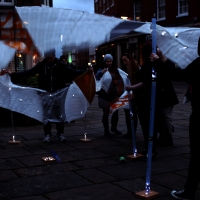
Lots of different options were discussed to attempt to overcome this from wire to catgut. One option that was experimented with was rope made from natural fibres. One of the Derby Makers has a machine that can make rope out of a collection of string and wool. We tried it out for this project; experimenting as the machine had yet to make a piece this long. The experiment was a success and was much sturdier. The downsides were that the method of making the rope is quite labor and time intensive. The aesthetic is also very different and is a little more imposing in the space. After this it was decided to go back to the wool used in the original prototype but in a different colour.

Rope made at the Silk Mill
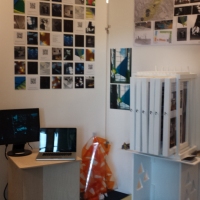
Alongside this I have been developing the design for the smaller installation in another area of the space. This piece has gone through many iterations. Initially the design was developed as a snug with a dense feel of strings.
After taking the small prototypes down from the main space they were put up in the second space to better visualise what could be developed.


The three separate pieces actually worked quite well with the existing feeling of the area. Once the pieces for display were installed it became apparent that this would be the way to go. So I drew up the CAD drawings and they will be put into the CNC soon!

AutoCAD Drawing for Smaller String Wall
For the design of this; as they are to be a more permanent piece; I looked at softening the edges. The first two are mirrored as they face each other. I thought having them rise up from the ground on either side up to a point would emphasise the sense of entrance. The 3rd piece is designed to become part of the landscape of the space emerging out from the floor and back again.
Stay tuned for more on this!


Loving it